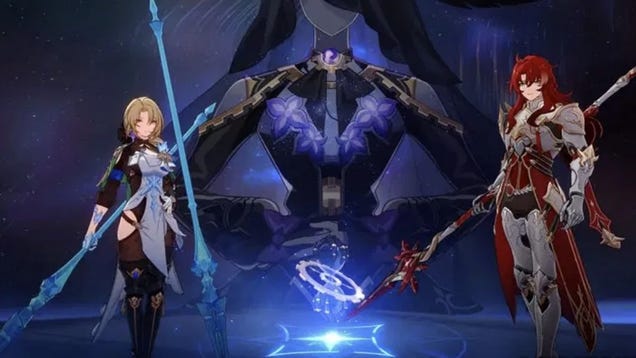
Version 2.3 of Honkai: Star Rail might have brought an end to the Penacony story, but it also introduced us to the new Apocalyptic Shadow game mode. This formidable challenge has you face off against two former boss enemies with some new tricks up their sleeves. If you’re having trouble facing these tough opponents, here’s what you need to know to turn the tables.
Suggested Reading
Suggested Reading
What is Apocalyptic Shadow?
Apocalyptic Shadow is meant to serve as more Honkai: Star Rail endgame content for players with high-level characters. Unlike other modes that feature multiple stages with waves of enemies, you only have to worry about two bosses. What spices things up are the additional traits they gain over the four increasing difficulties as well as some general modifiers.
Advertisement
If you’ve played the Pure Fiction game mode before, you already have a great idea of how the modifiers work. Similar to that mode’s Whimsicality and Cacophony effects, Apocalyptic Shadow has Ruinous Embers and Finality’s Axiom. The former refers to a unique stage effect that’s present in every fight while the latter are buffs that you can choose.
Advertisement
Two teams are necessary to take on the bosses. Your goal is to beat them as fast as possible, as there is an action value that keeps depleting. The fight will end prematurely if it reaches zero. Your score at the end is determined by how much of the action value and the boss’s HP (if any) remains. Aim for high scores to unlock additional rewards. While the mode is permanent, it will be updated every few weeks with a new phase and new enemies to challenge.
Advertisement

Apocalyptic Shadow Stormwind Knight tips
This first-ever phase of the mode is titled Stormwind Knight and pits you against Cocolia and Argenti. They both start with the Steadfast Safeguard trait, which buffs them with 50% less DMG taken. Breaking through their Toughness and triggering a Weakness Break will delay their action and increase their DMG taken by 100%.
Advertisement
What can help you even more is the Ruinous Embers effect for this phase. Whenever an enemy with the Steadfast Safeguard trait is Weakness Broken, your team will recover all of their skill points and have their Ultimates fully charged. The enemy will furthermore take 15% more Weakness Break DMG as well as 25% more Super Break DMG.
I’ll be breaking down specific strategies for each boss below, but I first want to go over some general tips:
Advertisement
- If you can trigger a Weakness Break on a boss’ by utilizing your Ultimates and Skills, go for it! The Ruinous Embers effect will fully recover skill points and recharge every character’s Ultimate, so it’ll be a waste to not go all out beforehand. (This is extra important for any healing Ultimates. You’ll be throwing away free health recovery otherwise.)
- Teams that center around Break Effects and increasing Break Efficiency will excel against both bosses.
- Speed is the name of the game, so feel free to add someone who can increase the SPD stats of your team or advance their actions. Asta and Robin are great picks.
- Characters with AoE attacks will be a big help since both of these bosses can fill their side with summons. Use AoE attacks to keep everyone in check.
- Consider bringing along any characters who can apply weakness types. Cocolia can transfer her Weaknesses and Argenti can summon statues with different Weaknesses. Silver Wolf, Boothill, or the recently released Firefly can bypass these inconveniences.
Advertisement

How to beat Apocalyptic Shadow Cocolia
Cocolia might be the more annoying of the two bosses in this mode. Her Frozen and Imprisonment crowd control debuffs can still be a real pain, especially when compounded with everything else she gains in Apocalyptic Shadow. Her unique boss traits are as follows:
- Battlefield Transfer (Difficulty 1-4) – Gepard joins as an elite enemy that can provide a shield for her. Additionally, Cocolia will transfer her Weaknesses to the Ice Edges she summons. Defeating them will return the Weaknesses and reduce her Toughness as well.
- Nowhere to Escape (Difficulty 3-4) – Cocolia’s summon will mark one of your allies. When Cocolia attacks with a single-target ability, she’ll follow up on the ally that was marked.
- Tenacious Resolve (Difficulty 4) – Reduces DMG received by all enemies, but every Weakness-Type they have increases DMG received.
Advertisement
Your biggest hurdle here will be the Battlefield Transfer trait. I highly recommend initially focusing on Gepard to get him out of the battle. While he won’t be too annoying when it comes to damage, you don’t want him to apply his shield.
The other half of that annoying trait will be needing to destroy her summons to reapply weakness. This process can stall the fight if you can’t take care of them quickly. It’s even worse in her second phase when she summons four of them with one weakness each. Prioritize the ones you know you can commit the most damage with first.
Advertisement
The second phase of this fight can be pretty tough as Cocolia will keep charging up her Last Choir of Genesis attack. If you can bring a healer that can also debuff your allies, they’ll be very helpful here. There’s nothing worse than having your DPS locked down by Cocolia’s Imprisonment debuff. Keep everyone free to move and always deal damage to take care of her.

Advertisement
How to beat Apocalyptic Shadow Argenti
Argenti requires a mostly similar strategy as he does in other fights. You’ll want to get rid of his summons to prevent him from gaining buffs. His unique boss traits are listed below.
Advertisement
- Reversal of Fortune (Difficulty 1-4) – Gains access to three Combat Stances that each summon four of the same statues.
- Chivalric Wrath – Summons Speartip statues and takes less DMG. Has Toughness Protection when there are four statues on the field.
- Golden Harvest – Summons Shield statues and increases DMG
- Medal of Elegance – Summons The Honored statues, which must be defeated to select him as a target again.
- Turn Back the Tide (Difficulty 3-4) – Instead of enhancing one statue to be Soulfreed, all statues will be during Phase 2.
- Stellar Protector (Difficulty 4) – All enemies are buffed to receive less DMG and deal more DMG for every summoned unit on their side of the field.
Advertisement
Just like Cocolia, it’ll benefit you to focus on taking out the summons. He’ll replace the statues with new ones once they’re all gone, but you don’t want them around to buff him. If you’re playing on difficulty 4, it might be worth leaving just one or two alive so you can focus on damaging him directly. There can be a small window before he summons another set and fighting four statues at the highest difficulty is not ideal.
Keep an eye on the countdowns and meters below his HP bar. Reaching the end of the countdown will result in him summoning shields that taunt each of your allies and only have one weakness. AoE skills, Ultimates, and/or characters like Firefly will be your best bet to deal with this.
Advertisement
Likewise, you don’t want to deal with the meter that appears in his second phase. If the four shields he summons manage to buff him all the way, he’ll deal some serious damage. Destroy one and then focus everything you have on him. Once he is Weakness Broken, let him have everything you got.

Advertisement
Best teams for Apocalyptic Shadow Stormwind Knight
Between the Ruinous Embers effect and the available buffs, there are some standout characters to pick and form teams with. I’ve listed some potential teams worth trying out to take on these tough challenges below along with the best buffs:
- High Damage for Cocolia – Acheron, Silver Wolf, Boothill, Huohuo, Sundered Paradise Axiom
- DoT Team for Cocolia – Kafka, Black Swan, Sampo, Huohuo, Persistence of Decay Axiom
- F2P Team for Cocolia – Xueyi, Qingque, Serval, Lynx, Sundered Paradise Axiom
- DoT Team for Argenti – Kafka, Luka, Guinaifen, Luocha, Ashen Battleground Axiom
- F2P Team for Argenti – Trailblazer (Preservation), Yukong, Asta, Natasha, Ashen Battleground Axiom
- Weakness Break for Either: Firefly, Trailblazer (Harmony), Ruan Mei, Gallagher/Natasha, Sundered Paradise Axiom
Advertisement
Of course, these aren’t the only characters who have a chance. Some other characters can fit similar roles as many of the above. There are also a lot of different buffs to make other potential teams viable.
Try using your favorite/strongest characters and experiment with different builds if need be. This likely isn’t the last endgame mode planned for Honkai: Star Rail, so there’s no problem with having fun when you can.
Advertisement
.
